

How to Refinish Old Radio Cabinet
Introduction
Collecting, restoration and renovation of old radios may be a very enthralling hobby. Nowadays such vintage models are mainly used as elements of interior ornamentation, hence their external appeal is of fundamental significance. A restored radio is a cute component of a retro mode room.
There are a lot of articles on the Cyberspace nearly repairing and restoration of vintage radios, but most of them concern repairing electronics. In this commodity, I focus on the restoration of the wooden radio cabinet.
Yous can do information technology yourself. It does not require advanced equipment or a broad knowlege and it is not a very expensive venture. Yous only demand some basic tools and a visit to a pigment shop or a carpenter's. The restoration, however, is work consuming, requires patience, accuracy and precision. If you can tinker a bit, with the post-obit quidelines yous will be able to return the old beauty of your vintage radio.
Bellow I describe the worst-case scenario i.eastward. such piece of work which is necessary to restore a very desperately damaged cabinet. When it is in better conditionthan the described bellow, you lot should make sure whether y'all really need to practise such radical restoring. You must be aware that by doing and then you are leap to partly remove the history of your rdio and information technology will lose role of its originality.
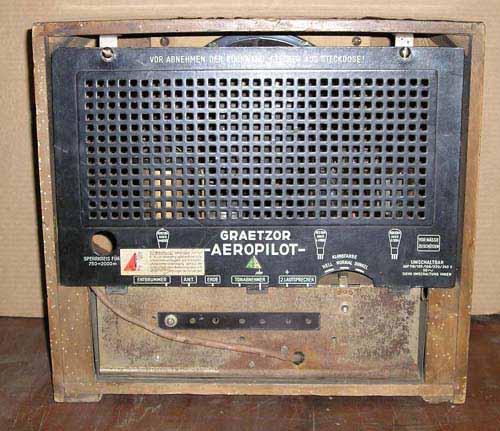
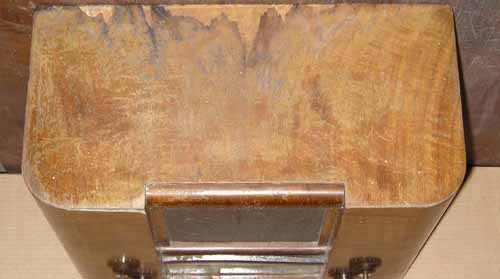
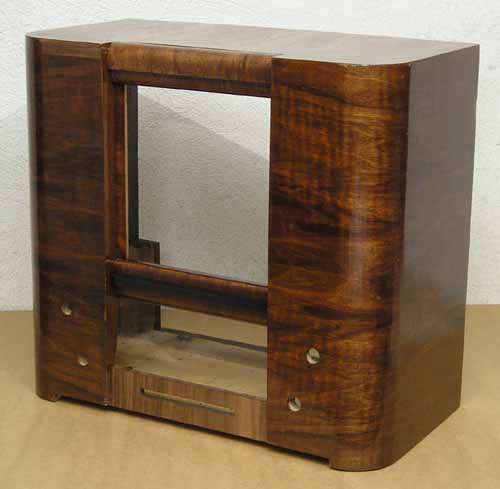
Equally an instance, I choose the model Graetzor Aeropilot (made in 1935) shown in the picture bellow.
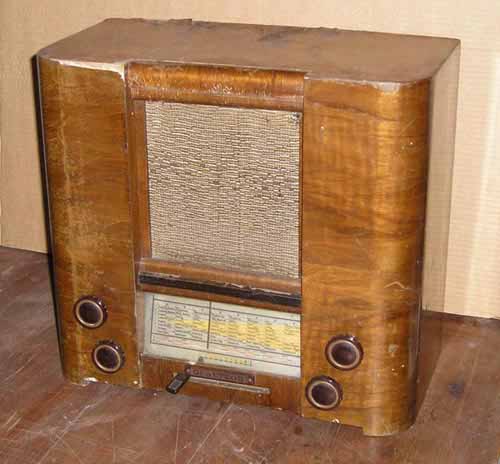
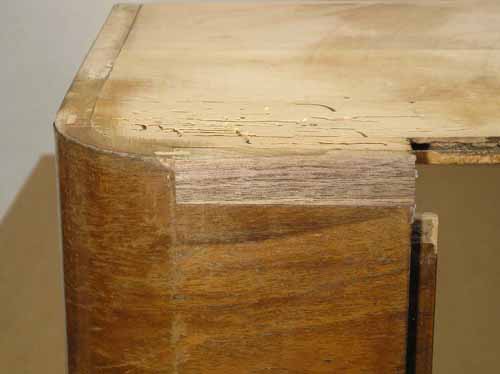
The first impression is non bad; a bit damaged venneer and some woodworms holes. On a closer expect yous discover that the loss of veneer tin not be repaired and must be changed. The desperately worm-damaged walls must exist reinforced, etc.
The whole piece of work can be divided into several stages, described in detail in the chapters below.
The shown methods of restoration I based on my ain experiences. I am sure that they do not frazzle all areas and problems which you can meet during repairing. For case, I do non draw wood polishing since I have never practised information technology.
Necessary equipment
You can non do without some bones equipment. Y'all need the follow tools:
- carpenter's presses – 4-vi pcs of different sizes, small-scale ones for damping apartment elements, large ones for clamping the whole cabinet
- a small syringe with a thick needle – to inject gum into apertures e.g. nether the venner where information technology comes off
- a small scraper – for removing the erstwhile lacquer or smooth
- a hard castor – for cleaning the cabinet
- a wooden block covered past felt on 1 side
- a pocket-size spatula
- a sharp knife eastward.g. used for wallpaper cutting
- brushes – dissimilar sizes
- small lathes of different sizes and thickness for equal printing even pressing while jointing splits
- a solderer – for dismantling and montaging the electronics
- screwdrivers – different sizes


Materials
- carpentry mucilage – a kind which can be mixed with water
- erstwhile varnish stripper in gel
- woodworm killer
- sandpaper – of dissimilar grain size – coarse – 100, medium – 500, fine – chiliad
- woods filler – acrylic is the best
- lacquer
- veneer – the same colour and texture every bit the oryginal comprehend - accesible in some wooden shops or at carpenters
- painting tape
- modelling enamed paint in black, brown

Dismantling
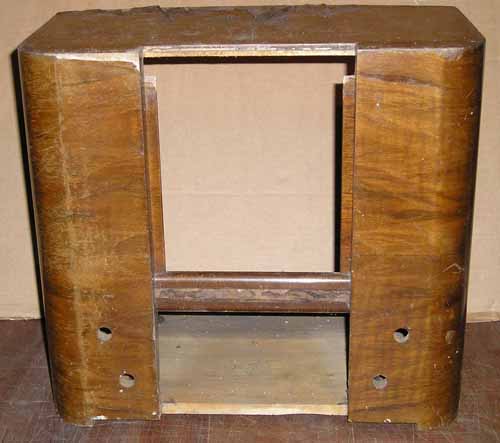
You begin your job with dismantling all interior elements (chassis, speaker, knobs). It is very useful to accept some photos of the within and the outside or drafts showing the details of the radio construction. Yous need to marking the electric connections which must be disconected. Information technology will be useful while putting the elemens together. Remove the emblems gently. If the lower bases are in unlike color than the whole cabinet, you would improve take off too. It will be easier to paint them. At the stop you go rawed cabinet.


Woodworms
If y'all can see small holes in the surface of the cabinet and dust cames out of them, that ways woodworms are inside. You must kill them, otherwise the whole work will exist lost. Fortunately, there is a elementary solution. You only demand some woodworm killer (accesible in paint shops). Use information technology co-ordinate to the manufacturer's recommendations, that is utilise the killer using a brush or inject it into the holes using an aplicator. Next, put the chiffonier into a plastic purse, seal the bag tight and leave it for 2-3 days. Finaly ventilate the chiffonier. In this way the woodworms are off.
Jointing splits
Get-go of all, y'all need to have a thorough expect of the cabinet. Pull by the walls, look at all joints and edges. If you notice whatever splits, you lot should joint them back. Put some carpenting mucilage between dissever parts of the chiffonier using a minor castor or a stick. If the aperture is narrow, use a syringe with a thick needle. Mucilage used into a syringe should be thin with a drop of h2o.
Discover: A syringe with glue must be kept in water (otherwise the gum volition set up in) and washed accurately after the work.
Press the jointed elements using carpenting presses and leave the cabinet for several hours till glue dries up.
If there are many splits in the cabinet, joint them i subsequently another.

Removing old lacquer
Use a special stripper (in gel) for removing the sometime lacquer blanket. The stripper makes the lacquer soft and easy to remove. Cover part of the surface with some gel, wait several minutes and strip the softened lacquer with a pocket-sized scraper. This way, fleck by flake, you will remove the whole lacquer from the surface of the cabinet.
Adjacent, youu accept to clean the whole cabinet using a hard brush and some warm water with a soft detergent. Clean the inside and outside of the cabinet thoroughly and accurately.
At that moment make sure that the veneer is well stock-still to the walls of the cabinet. Examine it closely. If blebs appear in the surface of the veneer, mark those places and repair them according to the procedure described in the „Repairing veneer" affiliate.
Notice: Blebs may disappear when the cabinet dries up. Do not be cheated, such places must be repaired anyway. If you do non do it, they volition get visible later and they volition make the cabinet ill-looking.
Repairing veneer
This is a key part of the piece of work. You should do it with a detail accuracy and precision. If there is any place in the surface where the veneer comes off, you must fix it. Beginning, spray some water onto the surface of the veneer. Clammy veneer gets flexible and easy to press. Information technology should be clammy but not wet. Too wet makes the glue thinner and the joint weaker. Inject some glue under the veneer every bit far as possible, not to leave any untreated space, cover the surface with a piece of plastic foil or paining record, a straight smooth lath ontop and printing information technology using presses. If you exercise non put any foil or tape, the board will fix to the surface. Of class, you do non want it. Moreover, the board must exist smooth, otherwise its texture will be stamped in the surface of the venner. Use the above method for all places where the venner comes off.


If there are blebs inthe middle of the wall, damp the veneer and cut it forth the texture using precipitous pocketknife. Inject some glue nether the veneer, put a piece of foil, and and so a lath and printing it. Afterwards drying upward, the cutting will be inappreciably noticeable. You can make full it later if needed.
If there is a loss of veneer, you must brand an insertion. Cut out and remove the damaged piece of the veneer shaped rectangularly. Gear up a sheet of new cloth of the aforementioned or like size, colour and texture. Utilise some mucilage, put the piece into its place, printing it and leave for drying upwards.
Exchanging the veneer on the whole wall surface is more difficult. First, you must remove the old veneer. An electric grinder and some coarse abrasive paper are useful. Ready a slice of veneer a bit bigger in size than the wall. The direction of the texture of the wood is important. Of course, the original direction should be kept.


If you have to joint two pieces of veneer, apply a piece of painting tape. Apply some glue onto the surface of the wall, put the sheet of veneer and press it. In that task, the nearly of import thing is to press equally. You lot can proceed following the picture blare. Use an fifty-fifty table surface, a piece of a thick lath and equally many as possible presses. The tighter such pressing is the meliorate.

When the glue dries up, trim and grind the edges. In the end, sand the surface of the veneer until smooth. First, use coarse, side by side fine sandpaper. That is a very work-consuming action. If you have an electric grinder, use it. Do the terminal sanding manually in order to avoiding making crosswise scratches, which could spoil the whole effect.

Filling
Small-scale veneer losses, woodworm holes and unevenness should exist filled. To this aim use some acrylic filler for wood. You have to select the proper colour. Fillers are available in various colours and may be mixed together. You can also add some powdered woods stain or tubed acrylic paint. The latter mixes well with acrylic filler, but exercise non try to add whatsoever enamel or oil paint, equally it does non mix with acrylic filler. When selecting the colour, call up that the filler volition become a chip lighter when it has dried up. Apply a minor spatula for filling all holes and depresions. Practice not apply more than filler than necessary, otherwise you will go tired while grinding.

When the filler has stale up, sand the surface using some fine sandpaper marked eg 400-600 spread on a wooden cake. Just in this mode will you get the sutface smooth. Sand but along the wooden texture. Do not utilize an electric grinder with an abresive band, because it makes crosswise scratches, which are ugly and difficult to shine.

Apply another blanket of the filler after cleaning the whole cabinet. Vacuum cleaner is really useful. Sand information technology again and then clean. Later that clammy the filled places with water and wait at them against the lite. Damping the surface improves the contrast and makes all the roughness more than visible. If you all the same see rough areas fill them again when the surface has stale up. On average twice or three times filling is sufficient. Filling is work-consuming, only necessary.
After that, clean the inside and the outside of the cabinet using a vacuum cleaner and a damp cloth and exit the cabinet for 24 hours equally a minimum.
Wait the chiffonier closely. If the surface is smooth, you tin can start lacquering information technology.
Lacquering
Showtime of all, y'all have to make up one's mind if the cabinet should exist shiny or mat and select the proper lacquer. Choose proficient quality lacquer, buy a pocket-size tin can. Near 100g is enough for 1 radio. If the surface looks good, without stains, use a colourless lacquer. If the surface looks a chip worse, use woodstain or lacquer containing wood stain. The good thing is that it masks some differences of the color, but does not cover the wood texture. The color of the wood stain should exist well-matched with the colour of the veneer. Information technology should be this same colour ot a flake, not much, darker.
Utilise 3-4 thin coatingsof the lacquer. The beginning 1 should make the footing pic, for which employ this aforementioned lacquer but mixed with some (twenty%) solvent.
Apply the lacquer with a castor, offset the nooks and hollows, the edges and in the end the flat surfaces. Castor along the forest texture, make the lacquer coating every bit thin as possible. Otherwise streaks and stains may appear.

When it has dried up, sand each coating with some fine sand paper. Sanding is meant to remove particles of dust, which settled while the lacquer was drying. Examine the smoothness by moving your mitt over the wooden surface.
Some radios contain brownish or blackness painted elements. Pigment them last matter using some modelling paint (bachelor from modelling shops). Such enamel paints coat surfaces well and are easy to use. A few mls is sufficient for one radio receiver.

Some raios have the back edge of the chiffonier painted brown. That should also exist coated last thing with some modelling paint.
Radio montage
When the final blanket of pigment has stale up, install the bases, emblems and other details. Clean the interior elements, repair the and restore them.
Install the loud speaker, electronics and other parts. The photos and drafts which you took while dismantling prove usefull now. This manner you lot have reached the end of the work.
Since that moment you can delight at the glitter of your cute radio.


Thanks to Ula Zochowska for assist in translating the text from Polish to English.
This article was edited 17.May.08 23:57 by Marek Tomczak .
Source: https://www.radiomuseum.org/forum/wooden_radio_cabinet_restoration.html
0 Response to "How to Refinish Old Radio Cabinet"
Post a Comment